Plot any global variable of your Arduino live, ten or more at once, at up to 100 samples per second on a Nano.
No extra Serial.print() lines, no Serial Plotter limits. Your own print output keeps running in the console.
Measurement and calibration · for ECUs and Arduino
XCP-Ray measures and calibrates control units live: automotive ECUs over CAN and LAN with standard XCP and DBC, and just as well your own Arduino or ESP32 over the USB cable. Watch every variable as a curve, change values while the firmware runs.
XCP on CAN / CAN FDXCP on UDP/IPXCP over USB serialDBCArduino & ESP32A2L from ELFLinux & Windows
Plot any global variable of your Arduino live, ten or more at once, at up to 100 samples per second on a Nano.
No extra Serial.print() lines, no Serial Plotter limits. Your own print output keeps running in the console.
Change thresholds, gains and timings while the sketch runs and watch the effect immediately.
Found the right values? Put them into the code once, instead of after every guess.
One library, one list of variables. The kit generates the description file (A2L) after every build.
Built for automotive ECUs, it works the same on your Arduino, and it is free. How it works
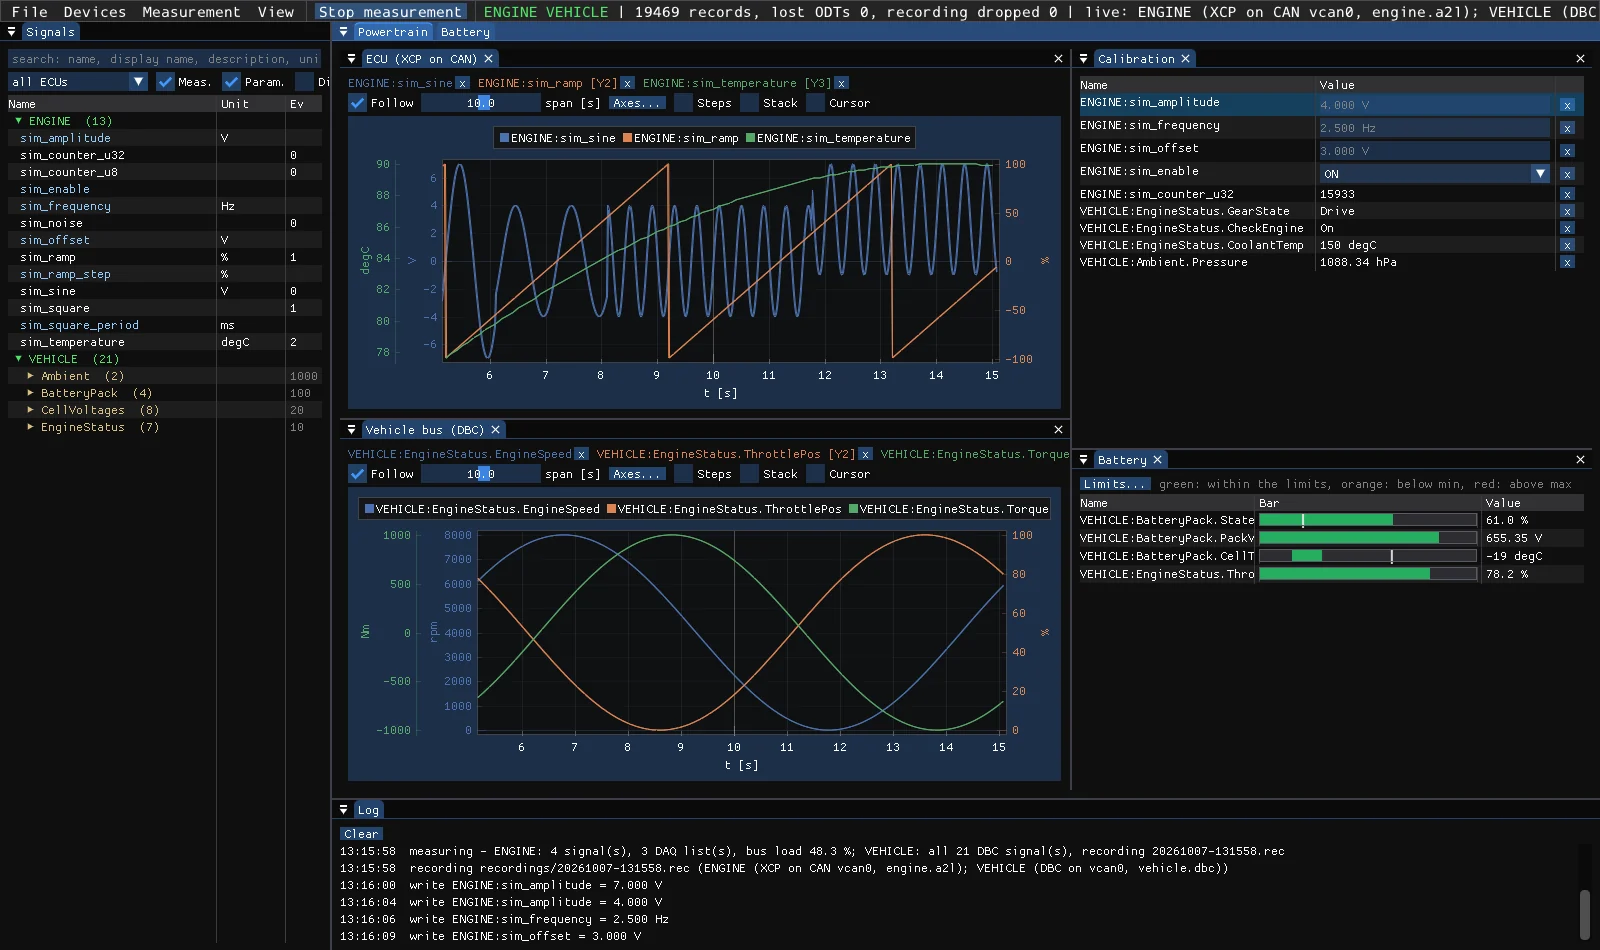
One CAN channel, two sources: the ECU over XCP and the vehicle bus from its DBC, recorded together on one time base.
Load the A2L of your ECU, pick the signals and press F5. XCP-Ray plans the DAQ lists, checks the bus load before it starts, and records everything the bus carries from the DBC on the side.
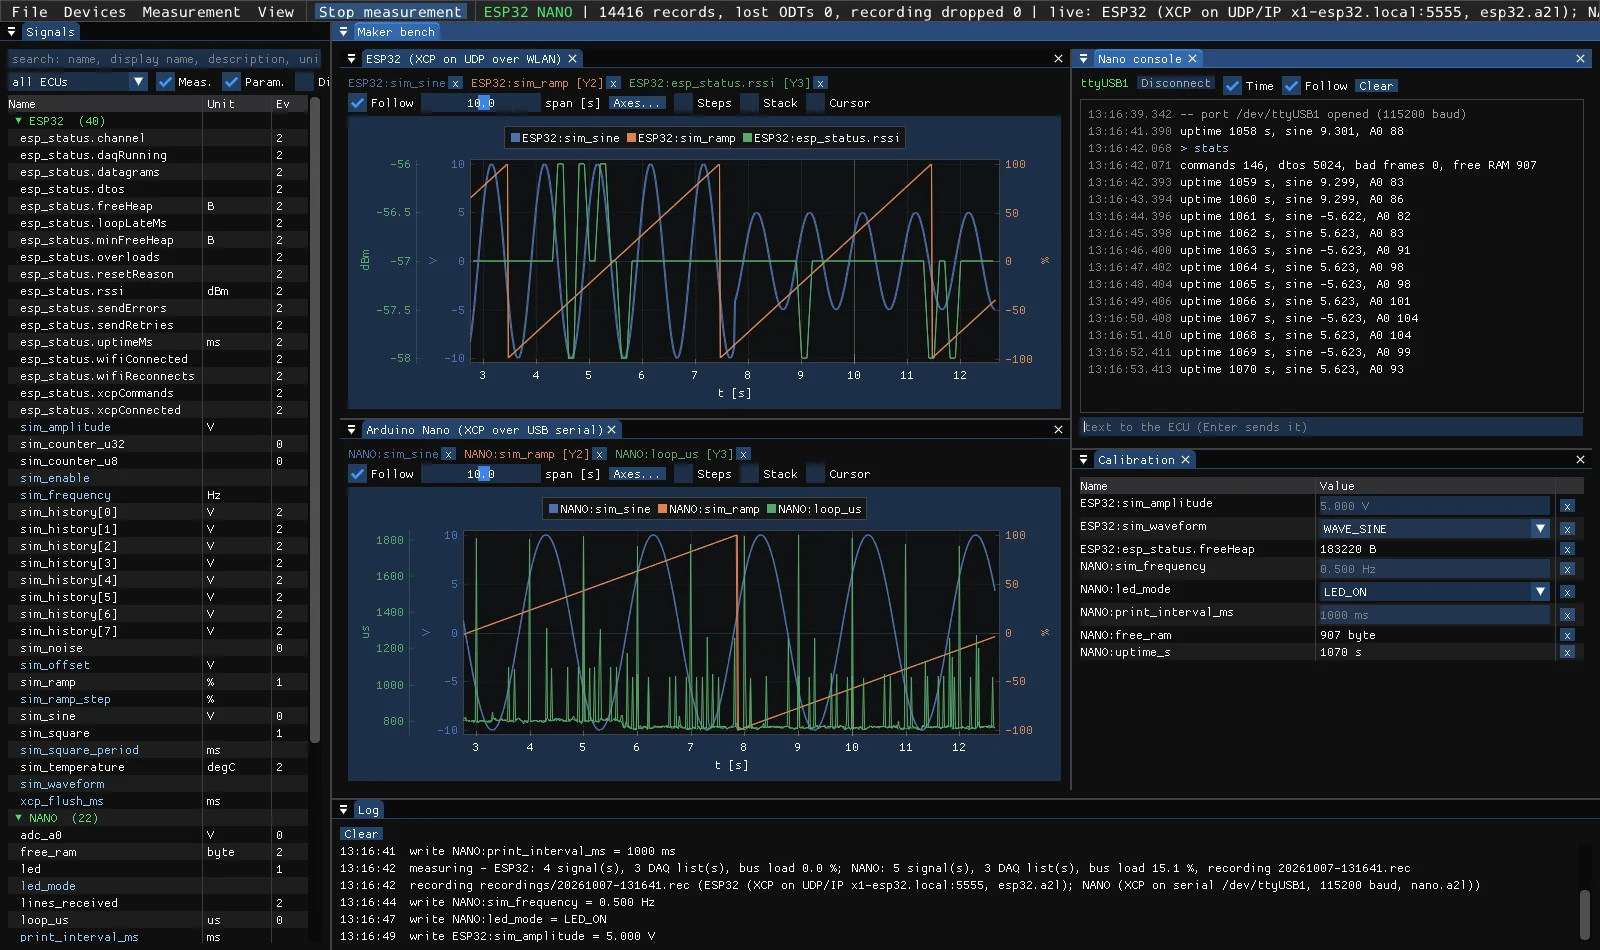
ESP32 over LAN (XCP on UDP/IP) and an Arduino Nano over USB, measured together. The Nano's Serial.print() output keeps running in the console.
Add one library to an existing project. Every global variable you list can then be plotted live and changed while the firmware runs, without new print statements and without reflashing.
Serial.print() keeps working and shows up in the console of the tool.Copy the library into lib/ and the A2L script next to platformio.ini.
Start XCP in setup() and poll it in loop():
x1xcp::Config xcp;
xcp.events = kEvents;
xcp.eventCount = 2;
x1xcp::begin(Serial, xcp);
List the variables to measure and calibrate in a2l/variables.json, then build: the A2L appears next to the firmware.
Add the board in XCP-Ray, open its console, measure:
13:16:42 > stats
13:16:42 commands 146,
         dtos 5024,
         bad frames 0
Up to ten Y axes per scope, auto-fit or stacked into separate bands. Min/max envelopes keep every spike visible at any zoom.
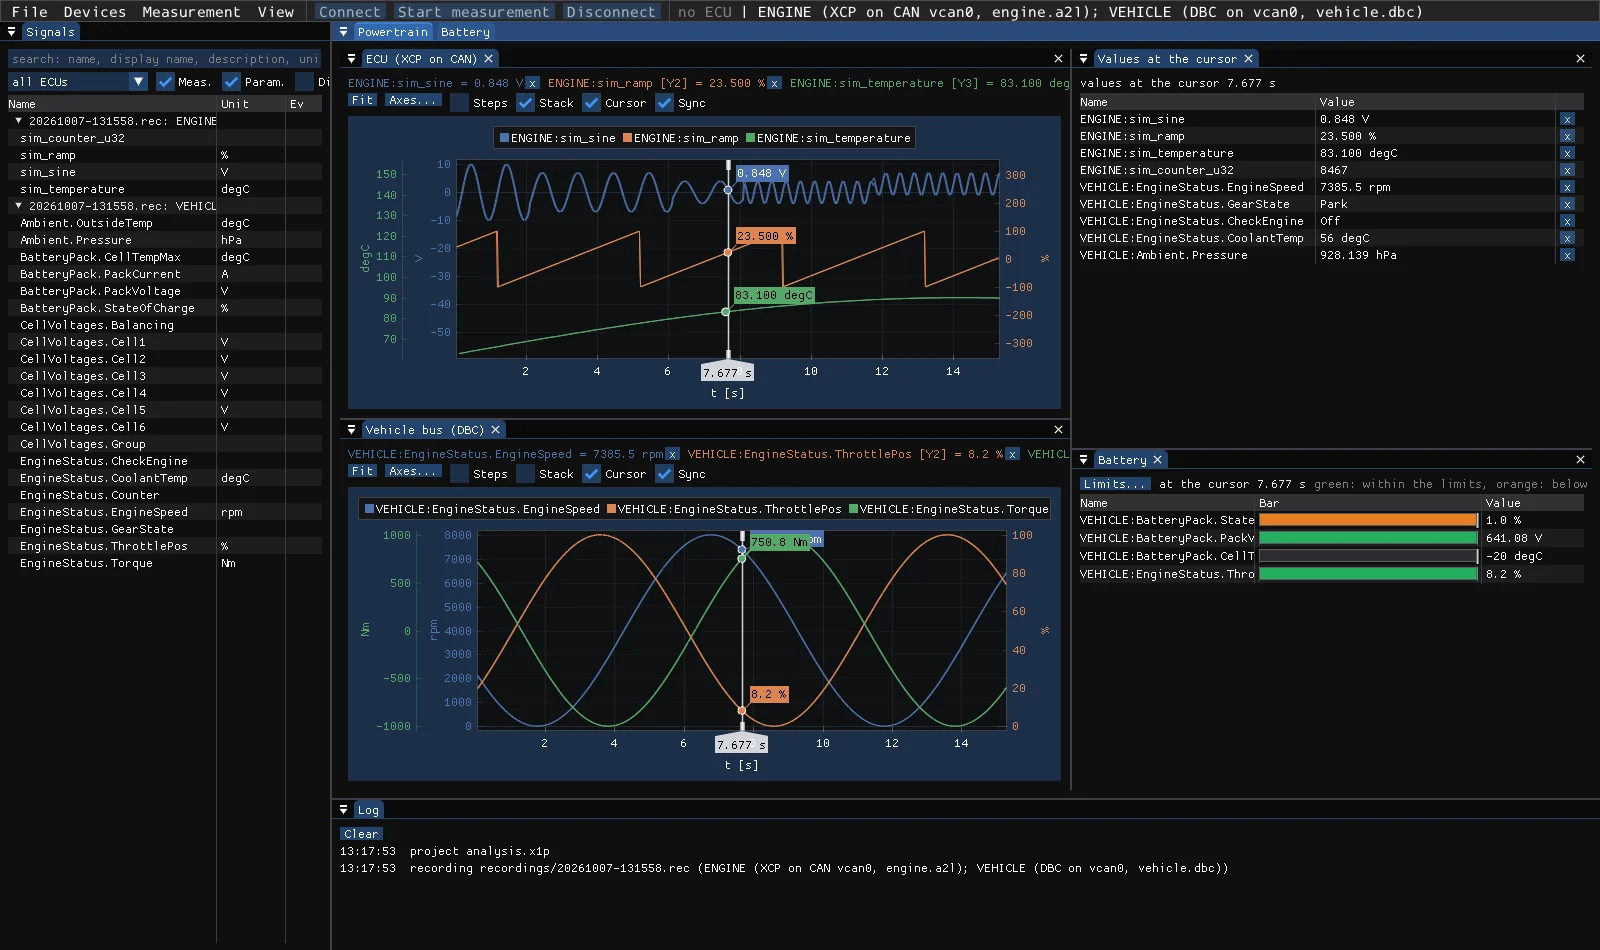
Measurement cursors with values, synchronized across scopes. Value and bar displays follow the cursor in a recording.
Edit parameters in physical units. Enumerations become drop-down lists, limits from the A2L are enforced.
Overwrite measurements too, row by row, when you need to force a value.
Every measurement is recorded on one time base for all ECUs and buses, packed into one .x1rec file afterwards.
Recordings open instantly, also hours long: the time pyramid is stored with the data.
Arrange scopes, value tables, bars and consoles on pages. Drag a page out onto a second monitor; the layout is saved with the project.
Export a project with its A2L and DBC files as one zip.
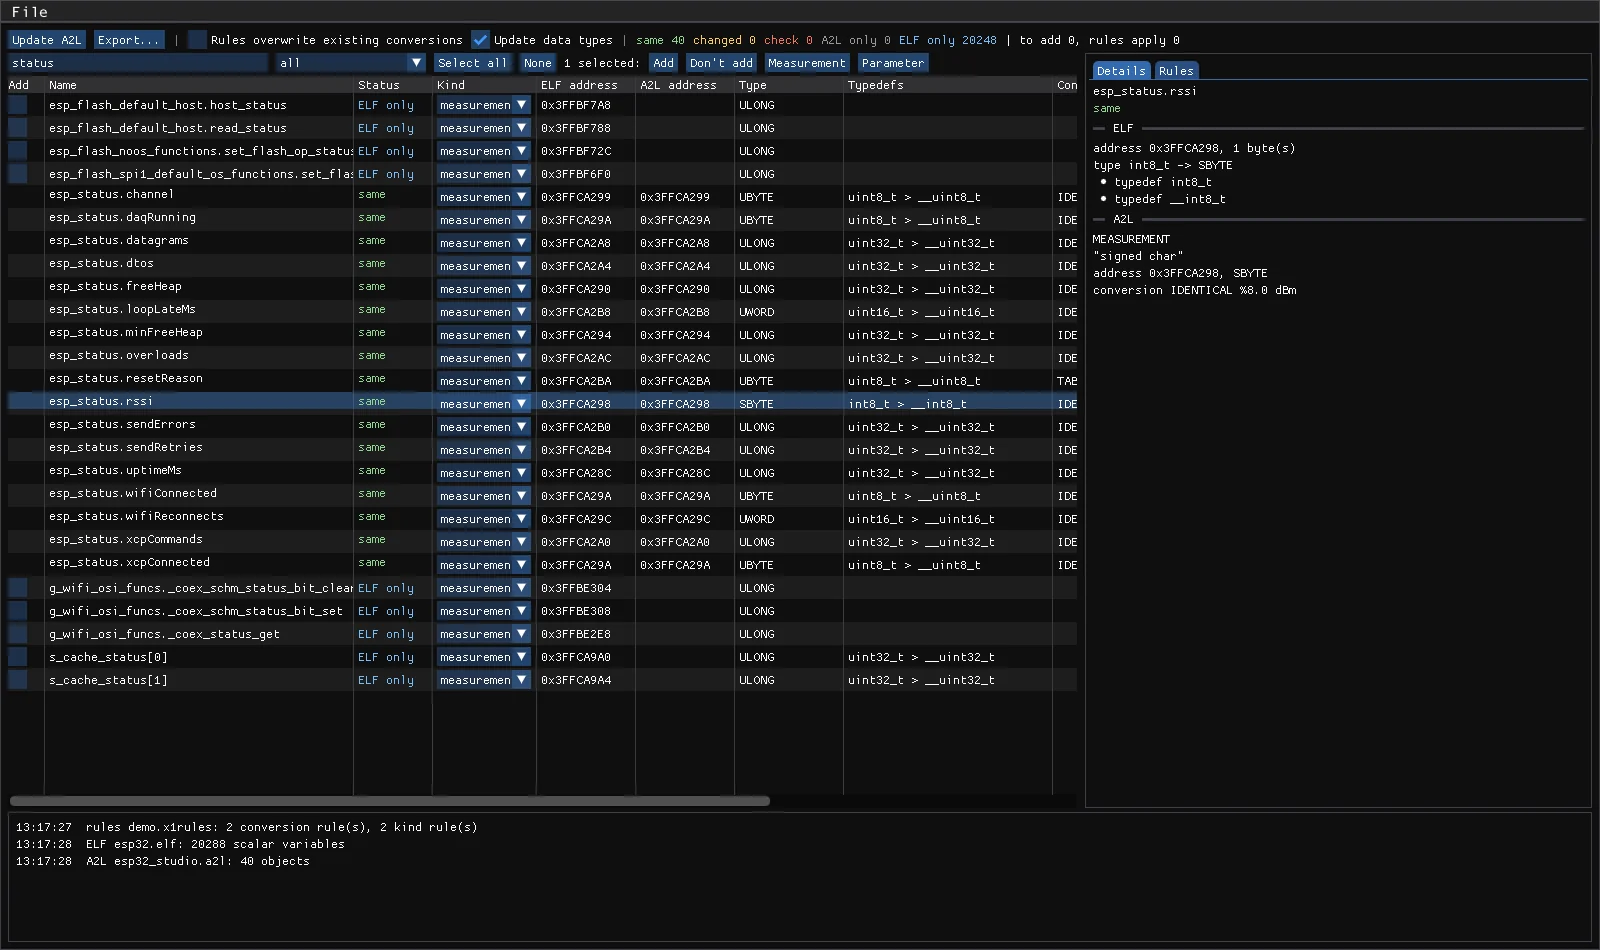
x1-a2l-studio compares your A2L with a new firmware build, updates addresses and data types, and adds new variables block by block.
Conversion rules by typedef: name a type once, every variable of that type gets its unit and scaling.
xcp-sim plays an ECU on a virtual CAN bus, over UDP or a serial line, with DBC test patterns. Try everything without hardware.
xcpray-cli reads, writes and measures from scripts.
XCP-Ray is freeware: no license fee, also for commercial use. It is not open source. Checksums: SHA256SUMS.
The tool, the command line, the simulator, the A2L tools and an example project that runs on a virtual CAN bus.
DownloadThe same tools without installation: unpack and start. start-demo.bat runs the simulator and an example project on this computer.
XCP over the USB serial port for Arduino AVR boards, with the print output in the console of the tool. PlatformIO library, A2L script, example, guide.
DownloadXCP on UDP/IP over the network (LAN) for ESP32 projects with the Arduino framework. PlatformIO library, A2L script, example, guide.
DownloadXCP on CAN, CAN FD and UDP/IP follow the ASAM standard, so XCP-Ray talks to standard ECUs and your ECU talks to other tools. The serial transport of the Arduino kit uses its own framing so that print output can share the line; only XCP-Ray reads it.
On Windows: PEAK adapters, for example PCAN-USB and PCAN-USB Pro FD, through PCAN-Basic, which comes with the PEAK device driver. On Linux: every adapter with a SocketCAN driver in the kernel, PEAK included (driver peak_usb). XCP-Ray sets the bit rate itself; on Linux it needs the right CAP_NET_ADMIN for that, which you grant once in a terminal: sudo setcap cap_net_admin+ep bin/xcpray-gui. XCP-Ray never runs sudo itself; when a right or an interface is missing, it shows the exact command to copy.
Yes. You do not need to know XCP or own a CAN adapter: the Arduino kit adds XCP to your sketch over the USB cable you already use, and generates the A2L file after every build. The kit is made for PlatformIO (for example in VS Code); tested with an Arduino Nano, other AVR boards like the Uno should work. For the ESP32 there is a kit over LAN.
Yes. Windows 10 and 11 (64 bit) with the same features: CAN and CAN FD with PEAK adapters, XCP on UDP/IP, COM ports for the Arduino kit, recordings and the A2L tools. No installation: unpack the zip and start the programs.
For an ECU, yes: it names the variables and their addresses. For your own Arduino or ESP32 firmware the kits generate it from the ELF file after every build. CAN buses only need their DBC file.
Yes. On Windows double-click start-demo.bat: it starts the simulator (XCP on UDP/IP on this computer) and opens the example project; then press F5. On Linux create a virtual CAN interface, start xcp-sim and open the example project as the README describes.